
Sells For Approx. $13.00 on Etsy
For this project, you will need…
- FABRIC PHONE CHARGING STATION PDF PATTERN PIECE (FREE DOWNLOAD)
- Fabric in two coordinating patterns (scraps or fat quarters work great for this project)
- (1) 10×5″ piece Peltex
- (1) 10×5″ piece fusible fleece
- Washable ink marker
- 6.5″ of 1/2″ bias tape maxi piping (optional)
- (1) 1 9/16″ plastic curtain grommet with setting kit
- Coordinating thread
- Denim sewing needle
- Basic sewing supplies: machine, shears, iron, pins, etc. (Be sure to check out the list of my 10 must-have sewing tools.)
To begin, print off and cut out the pattern pieces, and then use them to make your cuts. For each charging station, you will need:
From the coordinating fabrics:
- 1 front main body piece
- 1 back main body piece
- 1 outer pocket piece*
- 1 lining pocket piece
*Be sure to transfer the markings along the bottom edge of the pocket pattern piece onto the outer pocket piece.
From the Peltex:
- 1 main body piece
From the fusible fleece:
- 1 main body piece
- 1 pocket piece
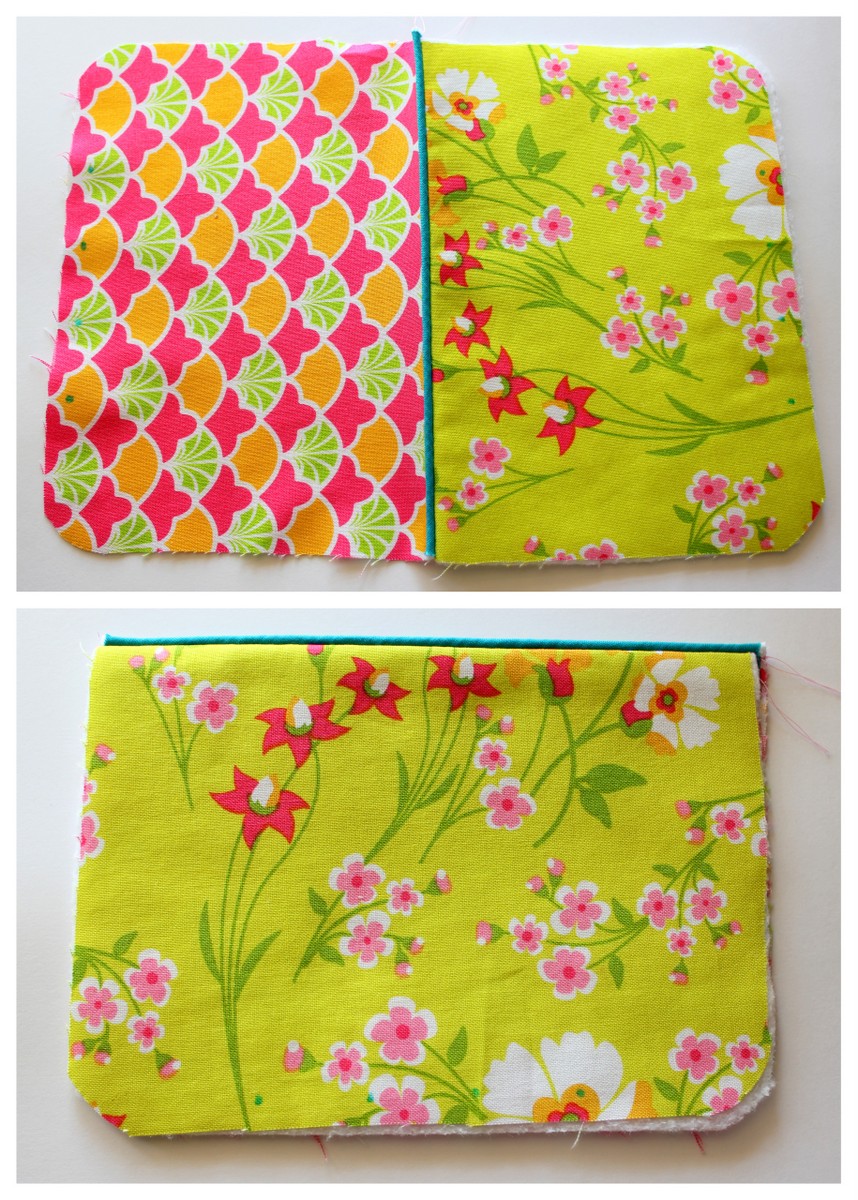
Use an iron to fuse the main body fleece piece to the wrong side of the back main body piece according the the product instructions. Fuse the main body Peltex piece to the wrong side of the main front piece according the product instructions. Fuse the fleece pocket piece to the wrong side of the outer pocket piece.
Align the outer and lining pocket pieces along their top straight edges, matching right sides together; pin. Stitch along the top edge using a 1/4″ seam allowance. (If desired, the optional piping can be inserted in this seam.) Press seam open, and the fold the pocket piece wrong sides facing along the seam. Press pocket flat. Baste 1/8″ along the open edges of the pocket piece to prevent shifting in the following step.
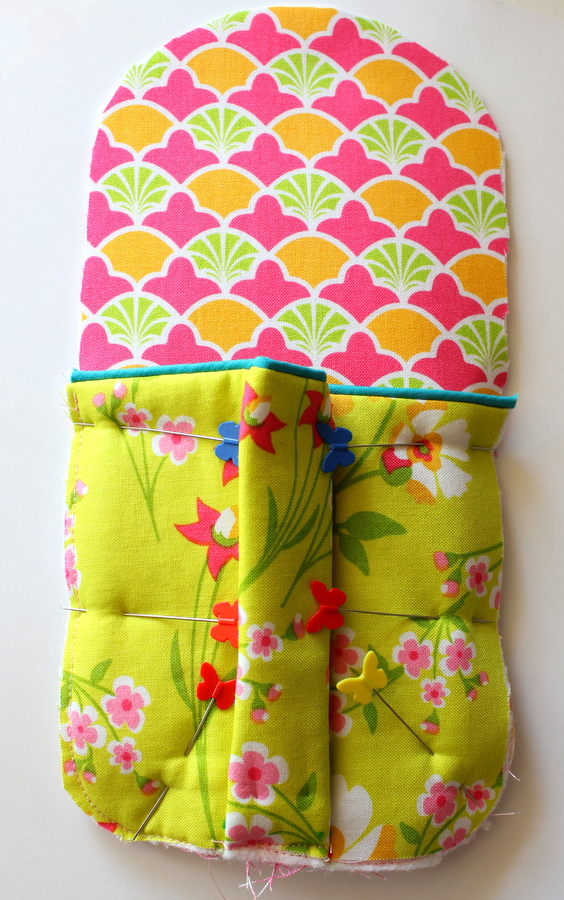
To form the pocket pleat, pinch the fabric together at the transferred mark B (the left center marking), and fold it over to the left so it is aligned with transferred mark A (the left outermost mark). Pin the fold into place. Now, do the same in reverse, pinching at point C (the right center marking) and folding it over to the right to align it with point D (the right outermost mark). Pin the fold into place. At this point, point B should be directly on top of point A and point C should be directly over point D, forming a pleat, as seen below. Baste 1/8″ from the lower edge of the pleat to secure it into place and remove pins.

Pin the pocket piece on top of the fused Peltex outer main body piece, so that the right side of the body piece is facing the wrong side of the pocket piece. Make sure to precisely align all of the raw edges, adjusting and pleating the pocket as necessary. Baste 1/8″ from the edge around the raw edges of the pocket to secure it to the main body piece; remove pins.
Position the fusible fleece-lined back main body piece on top of the front main body/pocket piece, aligning the raw edges. Pin. Use the washable ink marker to make 1 mark 1/2″ above the top edge of the pocket along the top right-hand side of the piece. Make another mark 2″ above the first mark. Using a 1/4″ seam allowance, stitch around the perimeter of the piece, beginning and ending at the marks to leave an opening for turning. Notch the top curve of the piece, and trim the seam to 1/8″, leaving the unstitched portion of the seam untrimmed. Carefully turn the piece right-side out through the opening and use a point-turner or skewer to make sure the seam is entirely turned. (The stiffness of the Peltex lining can make this a bit challenging, but trust me: it can be done! Also, if you notice the Peltex piece seems to be a bit puckered after turning, don’t worry: that will get taken care of when we press everything in the next step.)
Note: The photos below do not show the fusible fleece backing on the back main body piece, since that was a later addition to the pattern.

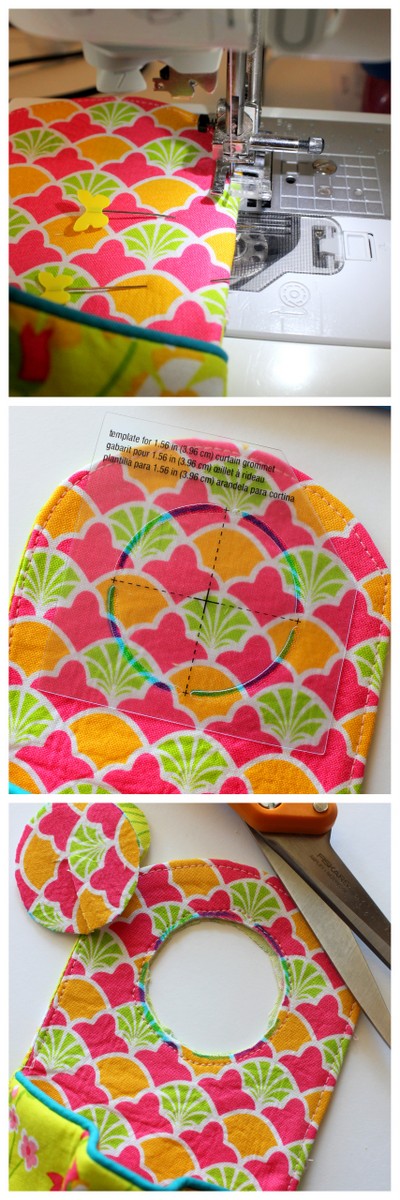
Press the piece thoroughly, making sure the opening portion of the seam is tucked neatly inside of the piece. Pin the opening closed. Edgestitch 1/8″ from the outer top edge of the piece, securing the opening as you stitch, starting and ending at the portion of the holder just above the left and right top edges of the pocket.
Using the template provided in the grommet kit, use the washable ink marker to transfer the template onto the top center of the piece. If desired, stitch just outside of the outside edge of this circle marking to prevent shifting as you set the grommet. Affix the grommet to the piece according to the instructions in the grommet kit.
YOUR FABRIC CHARGING STATION IS COMPLETE!
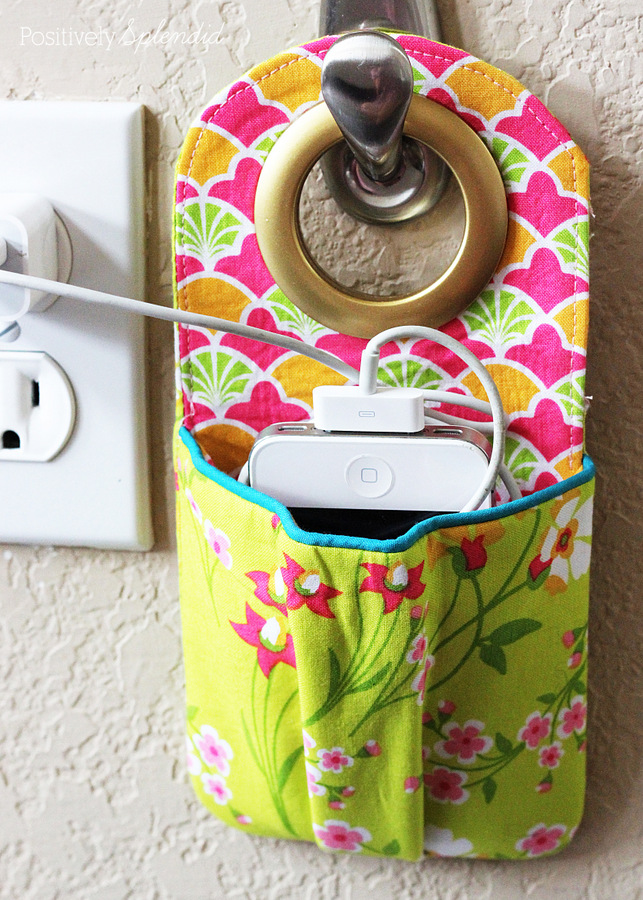
To use, simply hang the holder on the plug portion of the charger, and then tuck the phone and cord down inside.