Sells For Approx. $8.00 on Etsy
From The Crafty Quilter
Supplies
Mug Rug size: 6″ x 9″
- Scraps of 7 different fabrics (at least 1 3/4″ wide)
- Backing fabric, 6 1/2″ x 9 1/2″
- Binding fabric, (1) strip of desired width
- Batting, 6 1/2″ x 9 1/2″ (I used Pellon Thermolam Plus, but any type of leftover batting is fine)
- Optional: Paper-backed fusible web product for applique (I love Heat ‘n Bond Lite)
- Optional: Print out templates (below) for applique
Cutting Instructions
- Backing and batting are both 6 1/2″ x 9 1/2″ rectangles
- Fabric scraps: (7) 1 3/4″ x 6 1/2″ rectangles
Quilt As You Go Technique
- Baste the backing and batting together. For this small project, you can use pins or a small amount of water-soluble glue or basting spray.
- Make sure your bobbin thread matches the backing fabric. The top thread can be a neutral color.
- We are going to work from the center out to the sides. Place the first 1 3/4″ x 6 1/2″ rectangle right side up along the center of the quilt sandwich. Make sure it’s straight and parallel to the sides.
- Place the second 1 3/4″ x 6 1/2″ rectangle right side down, on top of the first rectangle, matching the raw edges.
- Stitch through all layers with a 1/4″ seam. Use a walking foot if needed. I’m using the integrated dual feed on my Bernina 770.
- Finger-press the seam open or use a seam roller.

Take the next strip and repeat the process, working to the right of the quilt sandwich. When you get to the edge, there may be a little batting and backing that remains uncovered. It will get trimmed away later.


- Turn the quilt sandwich and add the remaining fabric strips to the other half in the same manner.
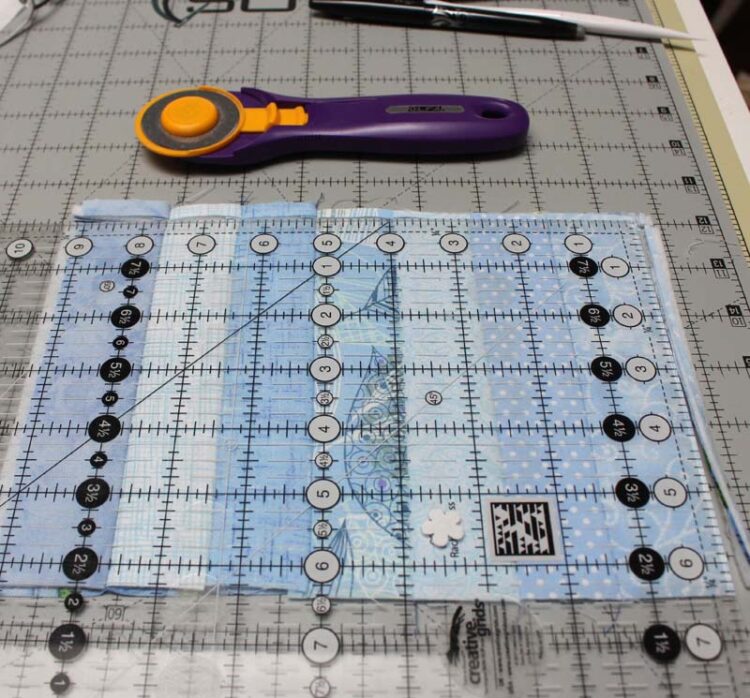
- Trim the quilt sandwich to a 6″ x 9″ rectangle.
- Baste around the edges, within 1/4″ of the raw edge, using a walking foot and long stitch length.