- Sells for approx. $10.00 on Etsy
- Very few selling
- 12″ x 11″ scraps of fabric
- 12″ x 11″ piece of fusible fleece
- Directions & Pattern
Materials to Make a Scissors Case
- Print the Scissors Holder Pattern here at 100% (no scaling/shrinking)
- Fat quarters or 12″ x 11″ scraps of fabric
- One piece for the main fabric (outside on back and middle pocket), I used a Tula Pink Imaginarium print
- One piece for contrast fabric (inside of top pocket and outside of bottom pocket), I used a solid fabric
- One 12″ x 11″ piece of fusible fleece
Download and print both pages of the PDF pattern at 100%, do not scale up or down to avoid distorting the pattern. Grab a pair of paper craft scissors and tape. Cut out the two pattern pieces. I found that leaving an extra half-inch on one edge where the pattern joins gives you a bit of extra stability when aligning the pieces to tape together.
Download and print both pages of the PDF pattern at 100%, do not scale up or down to avoid distorting the pattern. Grab a pair of paper craft scissors and tape. Cut out the two pattern pieces. I found that leaving an extra half-inch on one edge where the pattern joins gives you a bit of extra stability when aligning the pieces to tape together.
Grab your contrast fabric and place it right side up on your work table. Place the pattern piece right side down and pin in place.
Stitch along the outer edge using a quarter-inch seam beginning on one side of the opening. Back stitch a few times when you start stitching and stop stitching on either side of the opening to help strengthen the seam for turning inside out.

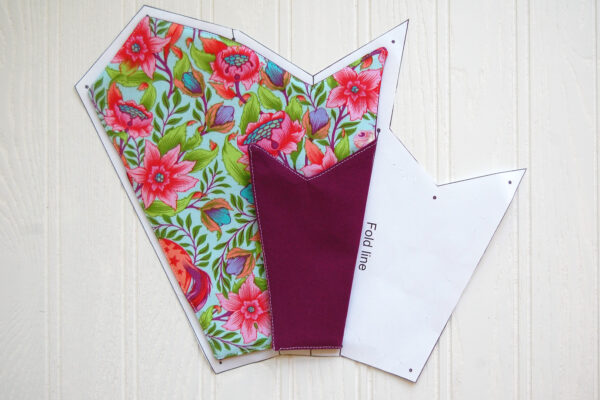
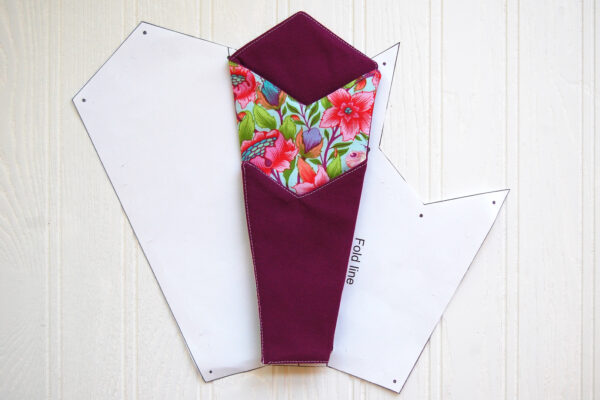
First flip the short side over the top of the middle section following the fold line. Press well.

Next, flip the other side of the scissors case underneath the middle, and press well. You’ve now completed the accordion fold! Think you might like the scissors case folded in the other way? No problem, just flip it in the other direction and press again!
Pin through both layers from the bottom folded edge all the way to the top. along the back edge of the scissors case.
Begin stitching from the folded edge and stitch, following the edge stitching. Back stitch a few stitches when beginning to sew.
Pivot at the corner, and continue to follow the topstitching as you sew.
Stitch all the way to the end of the long edge, back stitching to create a strong corner at the top of the first pocket
Now place the scissors case on your worktable, pocket side up.
Flip the small pocket back over the top of the scissors case, and pin in place.
Begin stitching close to the folded edge, about an eight to a quarter inch from the folded edge. Back stitch to create a strong finish to keep the pointy ends of scissors from poking through the bottom of the case.
