Sells For Approx. $14.00 on Etsy
Cutting the Fabric Cover for your Book:
**I am going to show you how to calculate the fabric measurements you will need for your notebook. If you have a notebook that measures 5″ X 7″ like mine does, you can just skip to the final summary of the measurements.**
Before we can cut into our fabric, we need to measure our notebook.
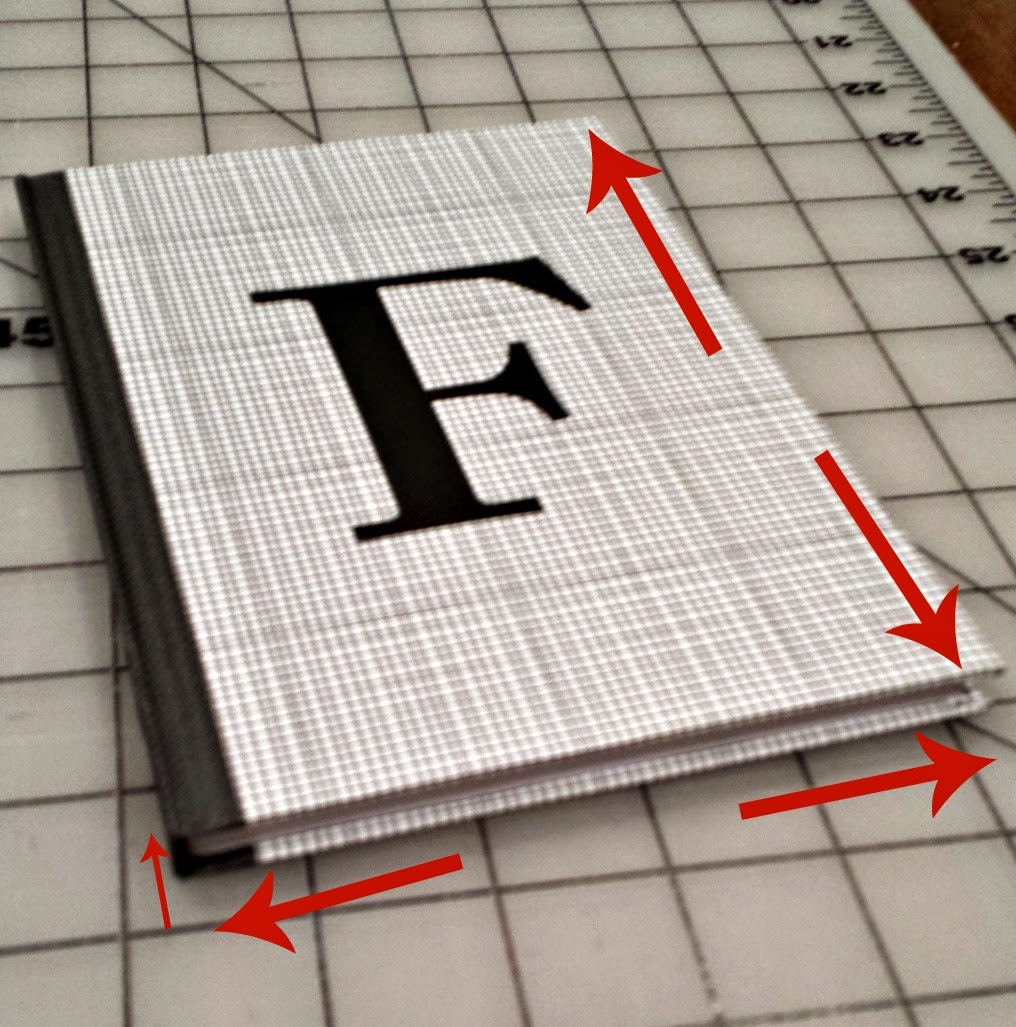
You need to measure how wide, how tall and how deep your notebook is. To sew our cover, we will be using a 1/2″ seam allowance, so we need to add some extra fabric to account for that. In my example the notebook I found was 5″ wide, 7″ tall and 1/2″ deep. The first calculation will be the height of the fabric pieces I’ll be cutting. My book is 7″ tall. I need to add 1/2″ to both the top and bottom to account for the seam allowance. I’m also going to add 1/4″ to compensate for the thickness of the front and back cover- if you’re using a composition notebook, or one with a thin cover, you won’t need to do this. So my total will be: 7″ + 1/2″ + 1/2″ + 1/4″= 8 1/4″
The next measurement we need is the length of the cover. My book is 5″ wide. I need to add another 5″ for the back. Next I’ll add my seam allowances: 1/2″ for the front cover and 1/2″ for the back cover. Then I will add 1/2″ for the depth of the book and finally the extra 1/4″ for the thickness of the cover.
5″ + 5″+ 1/2″+ 1/2″+ 1/2″ + 1/4″= 11 3/4″ total width for the front.
I will also need two sleeves for my covers to slide into- they will need to be 8 1/4″ tall, and we will fold them over to create the sleeve, so they will be 8″ wide so the final sleeve will be 4″ deep. The final measurement for my sleeve pieces: 2- 8″ X 8 1/4″ pieces
The final measurements we need to calculate are for the pocket on the front of our notebook. Mine is going to be 2″ wide, but we need to add in fabric for the seam allowances, which in this case will be 1/4″. The back piece for the pocket will be 2″ + 1/4″ + 1/4″= 2 1/2″ X 8 1/4″. The front pocket piece will also be 2 1/2″ wide, but I want it a little taller, so I’m adding a couple inches so the pocket goes higher than half-way up the book. The front pocket piece will be 2 1/2″ X 10 1/2″.
Now, we need to add more pieces of fabric so our final front cover piece will again measure 11 3/4″. I want the pocket to be near the front, so the fabric on the right will be small. I only want about 1/2″ of the main fabric to show on the edge, so I will take the 1/2″ I want to show, add the 1/2″ seam allowance for the cover pieces and the 1/4″ seam allowance for the pocket pieces- 1/2″ + 1/2″ + 1/4″= 1 1/4″ X 8 1/4″.
The last piece we need is where it gets a bit tricky. We know we need a total of 11 3/4″, but we need to think about how much of that we already have covered. The pocket will be 2″ wide (I’m going to ignore the 1/2″ we added to our cut pieces because that will already be sewn into the piece) and the front edge piece will be 1/2″ + 1/2″ seam allowance- so 1″ (again we leave out the 1/4″ seam allowance because it will already be sewn in). If we add those together 2″ + 1″= 3″ already covered in our first two pieces. So we subtract that from our final measurement 11 3/4″-3″= 8 3/4″- then we need to add in 1/4″ seam allowance for the pocket side 8 3/4″ + 1/4″= 9″. The final piece needs to measure 9″ X 8 1/4″.
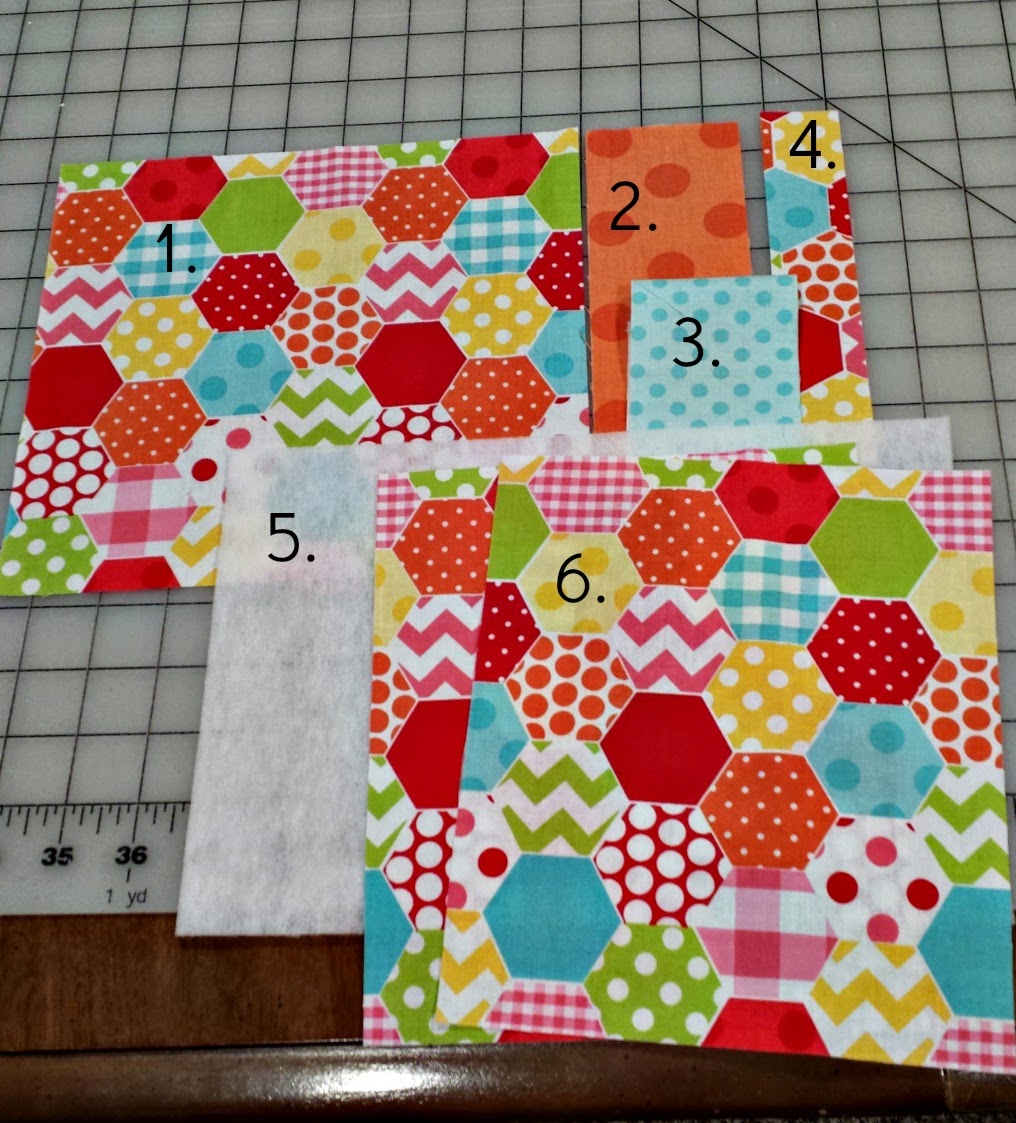
To Summarize:
Main fabric:
[1.] 9″ X 8 1/4″ (main front piece)
[4.] 1 1/4″ X 8 1/4″ (front edge)
[6.] (2) 8″ X 8 1/4″ (sleeves)
Accent Fabric(s):
[2.] 2 1/2″ X 8 1/4″ (pocket back)
[3.] 2 1/2″ X 10 1/2″
11 3/4″ X 8 1/4″ (inside of notebook- not shown in picture)
Fusible Fleece or felt
[5.] 10 3/4′ X 7 1/4″ if using fusible fleece, 11 3/4″ X 8 1/4″ if using felt
Assembling your Fabric Cover:
We will start with our front cover.
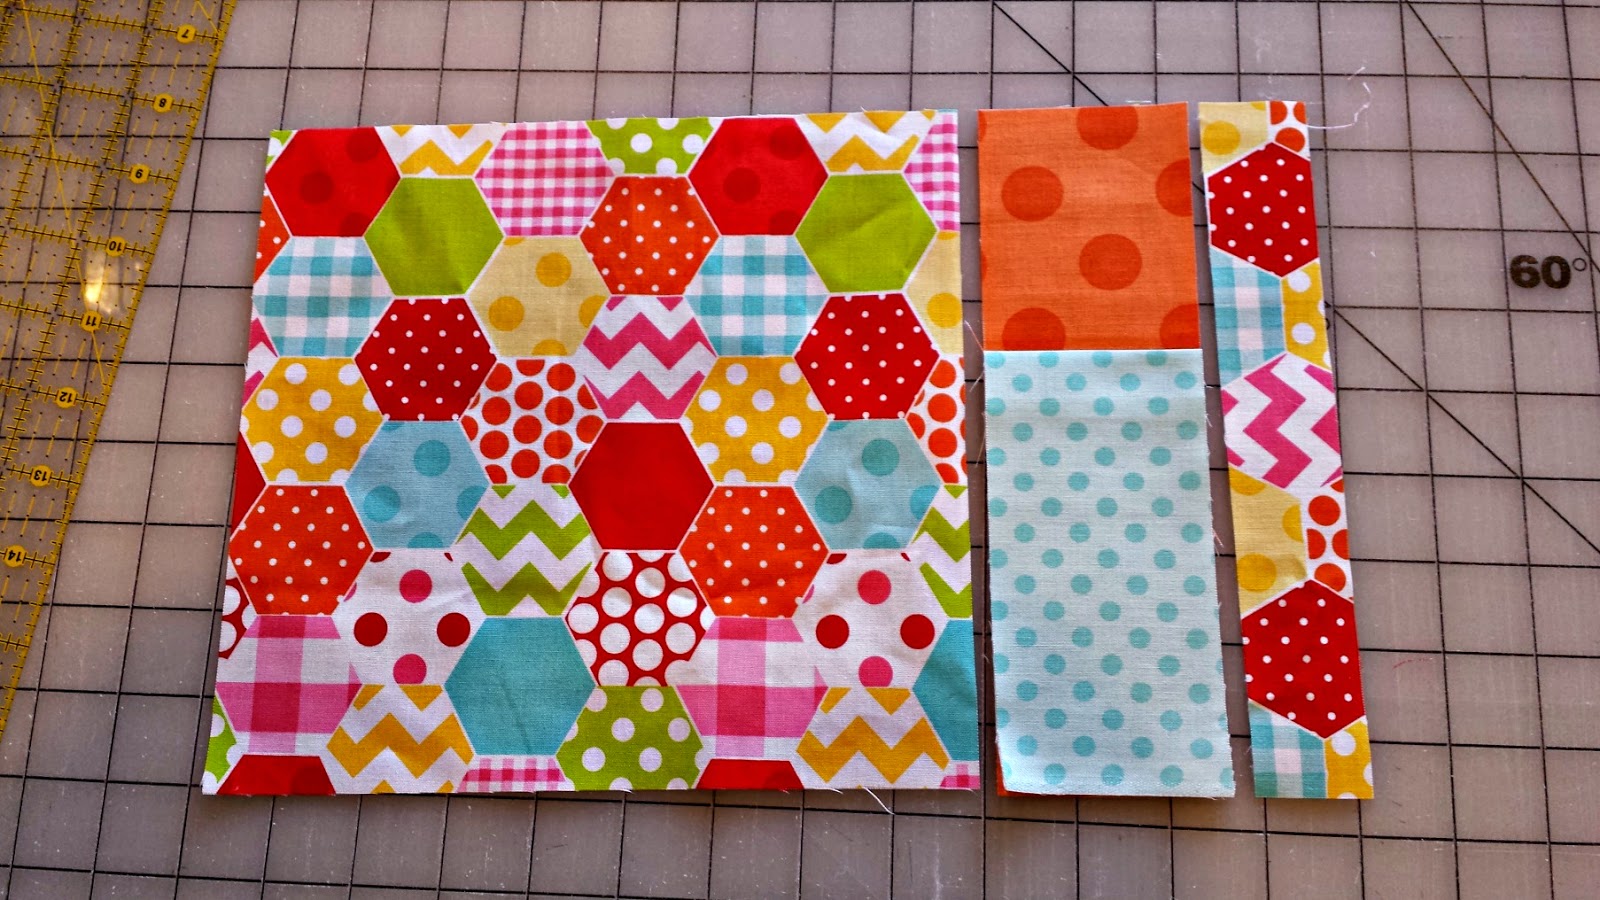
Fold the front pocket piece in half, wrong sides together, and press. Top stitch the folded seam if desired. Line up the front pocket piece with the bottom of the pocket back, all edges should be raw, the folded edge should be in the center. Line up the small edge piece with the right side of the pocket piece, right sides together (RST). Sew using a 1/4″ seam allowance. Repeat for the large cover piece, lining it up with the left side of the pocket (RST). Sew (1/4″ s.a.).
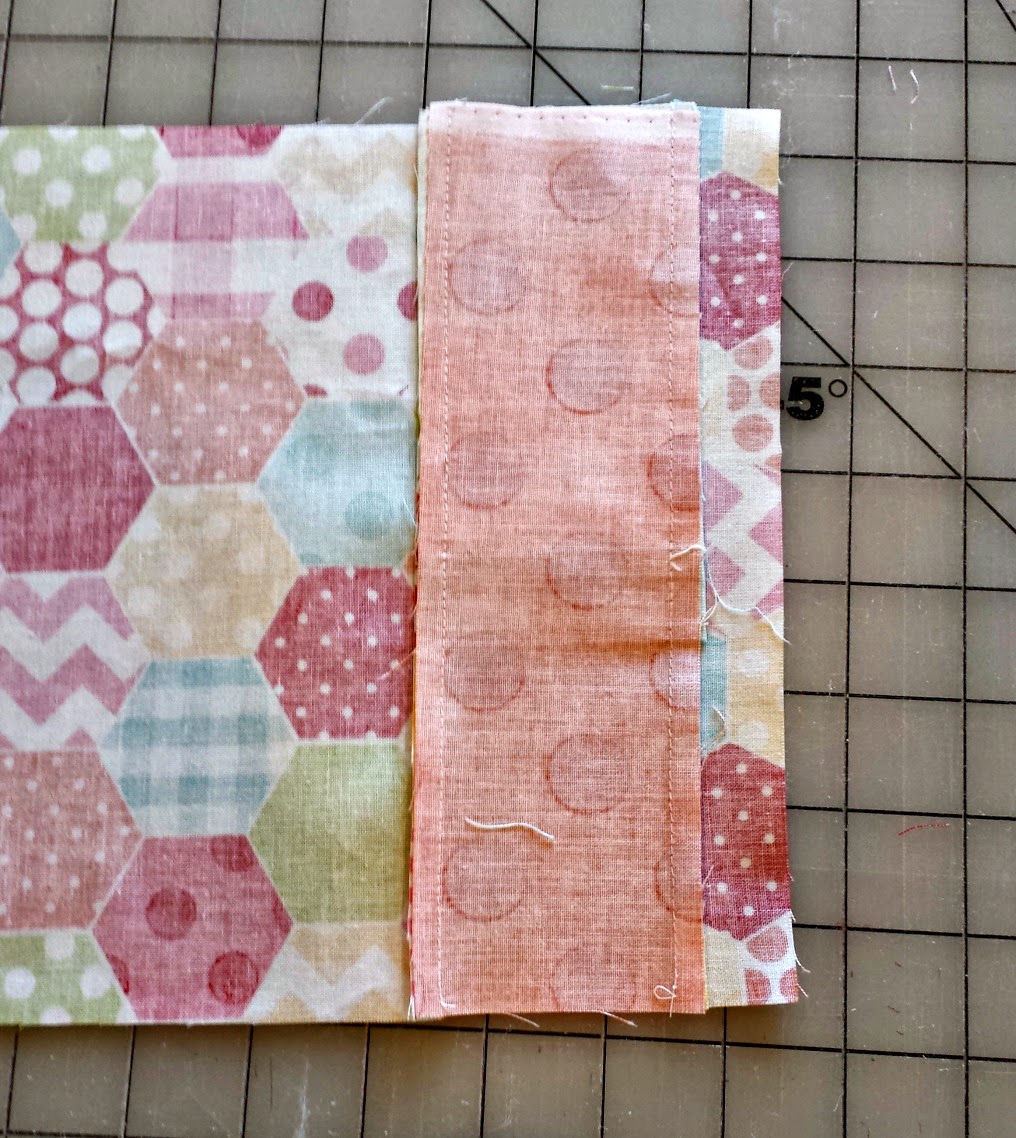
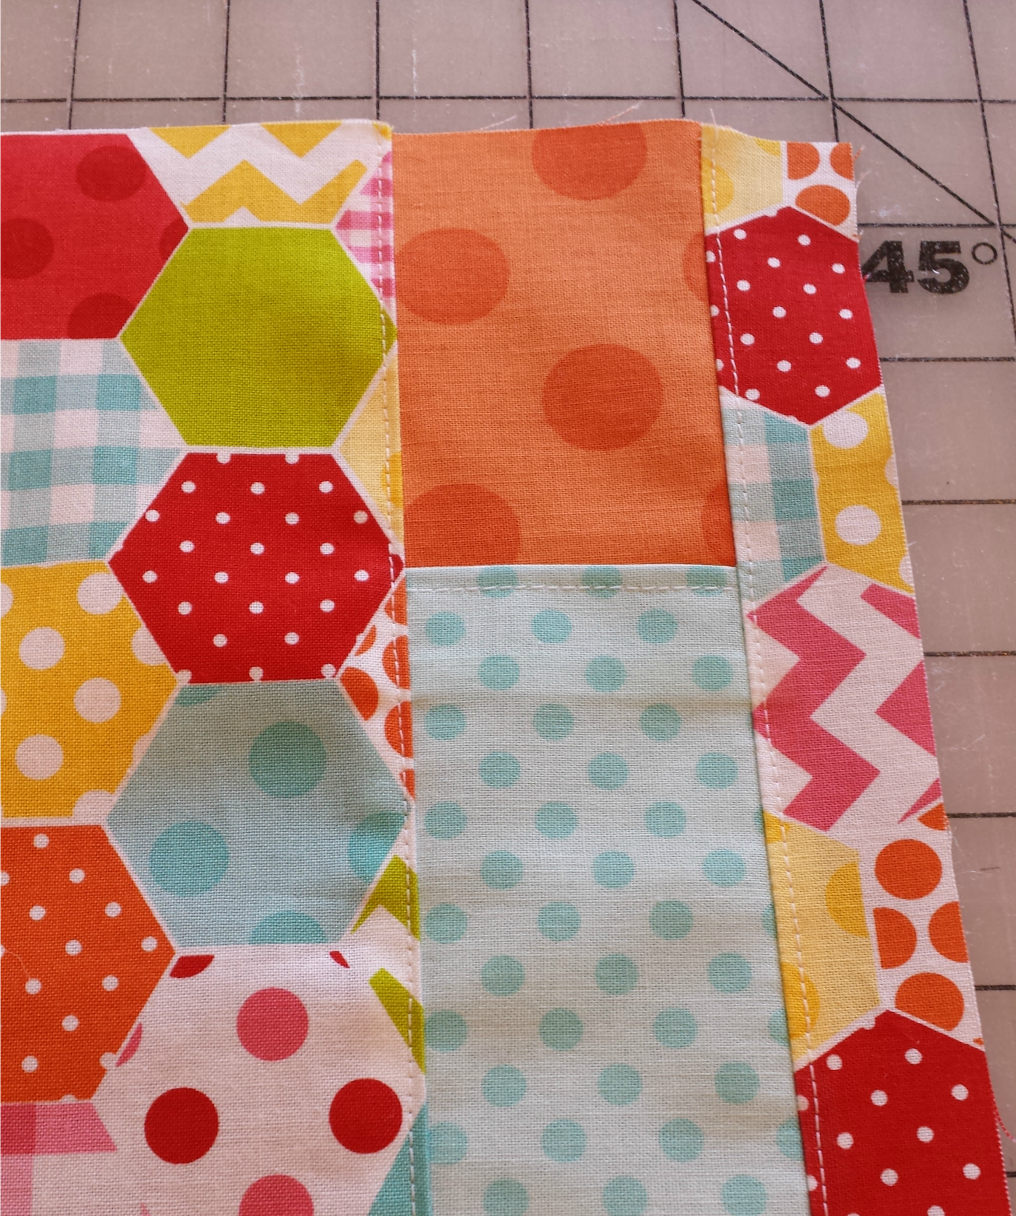
Press the pocket seams toward the main cover pieces as shown. If desired top stitch along the side seams. (see picture)
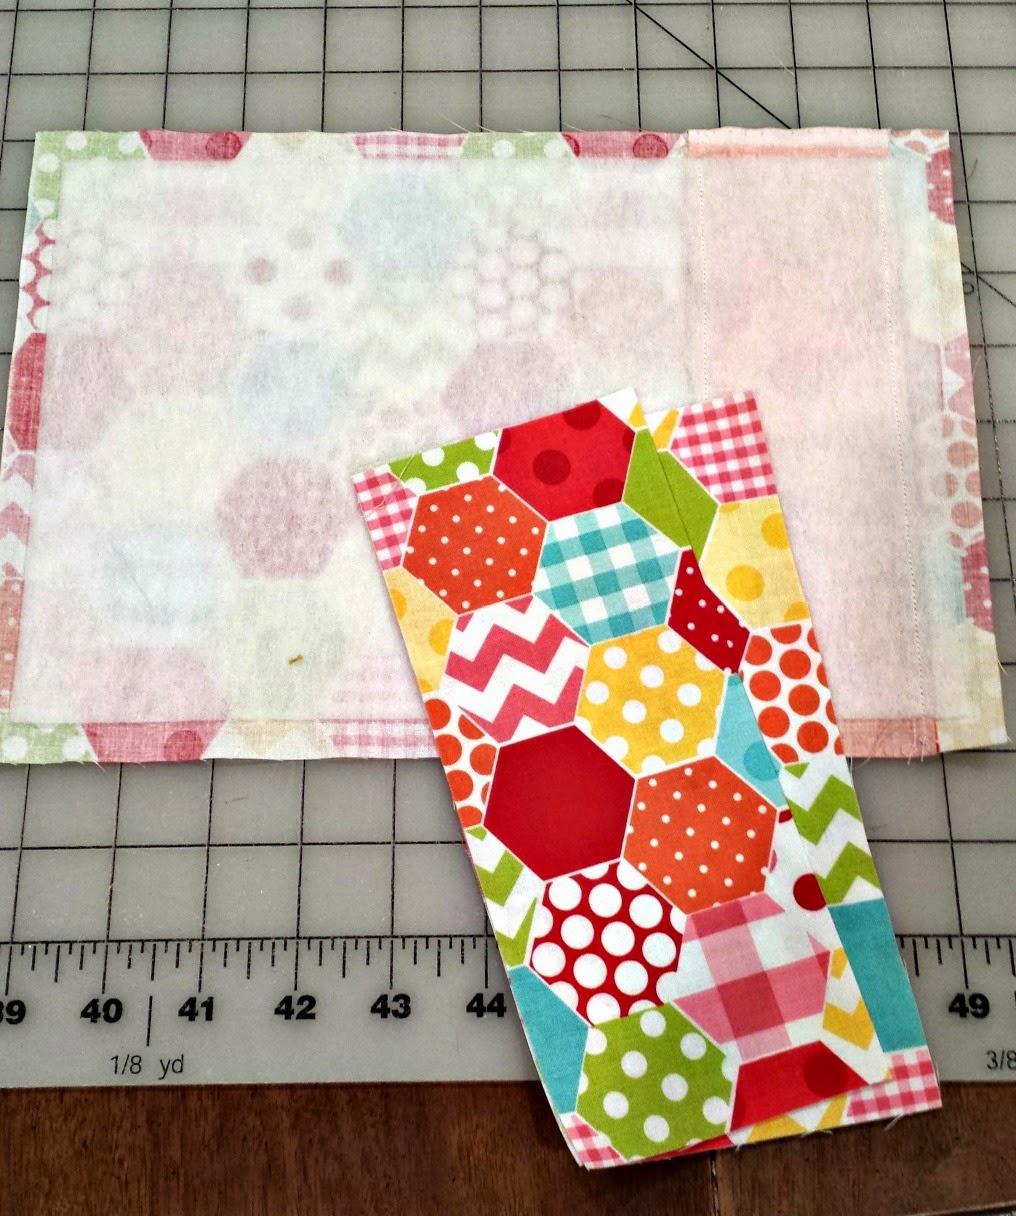
Center the fusible fleece on the back side of the front cover with the fusible side down. Turn over and fuse to the cover. (If using felt, just line it up with the inside cover piece before sewing around the whole cover) Press the sleeve pieces in half to create two pieces that are 4″ X 8 1/4″.
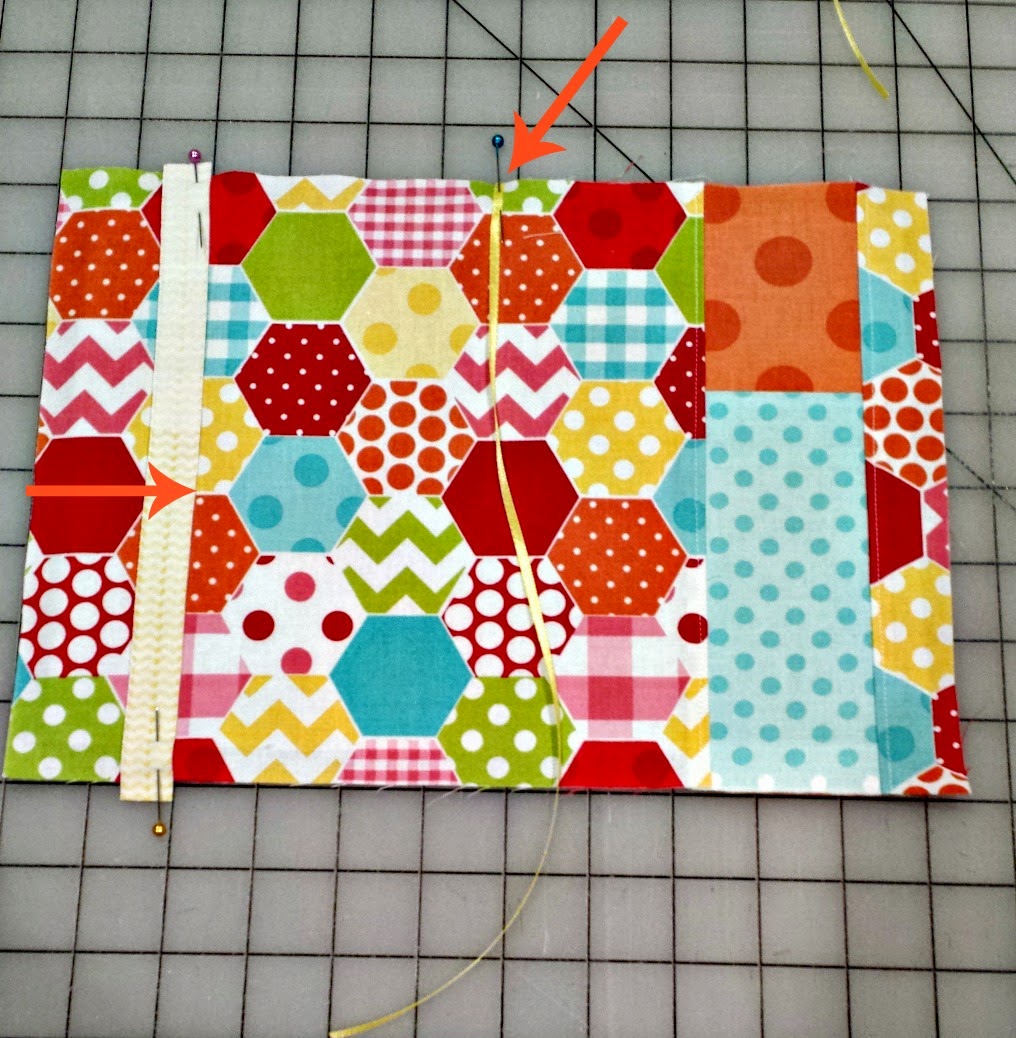
Cut your elastic to the height of your notebook, in my case 8 1/4″. Cut your ribbon the height of your notebook + a few inches- in my case approx. 12″. Line up the elastic 2″ from the left edge, pin in place right side down. Center the ribbon on the top edge of the cover piece. Pin in place.
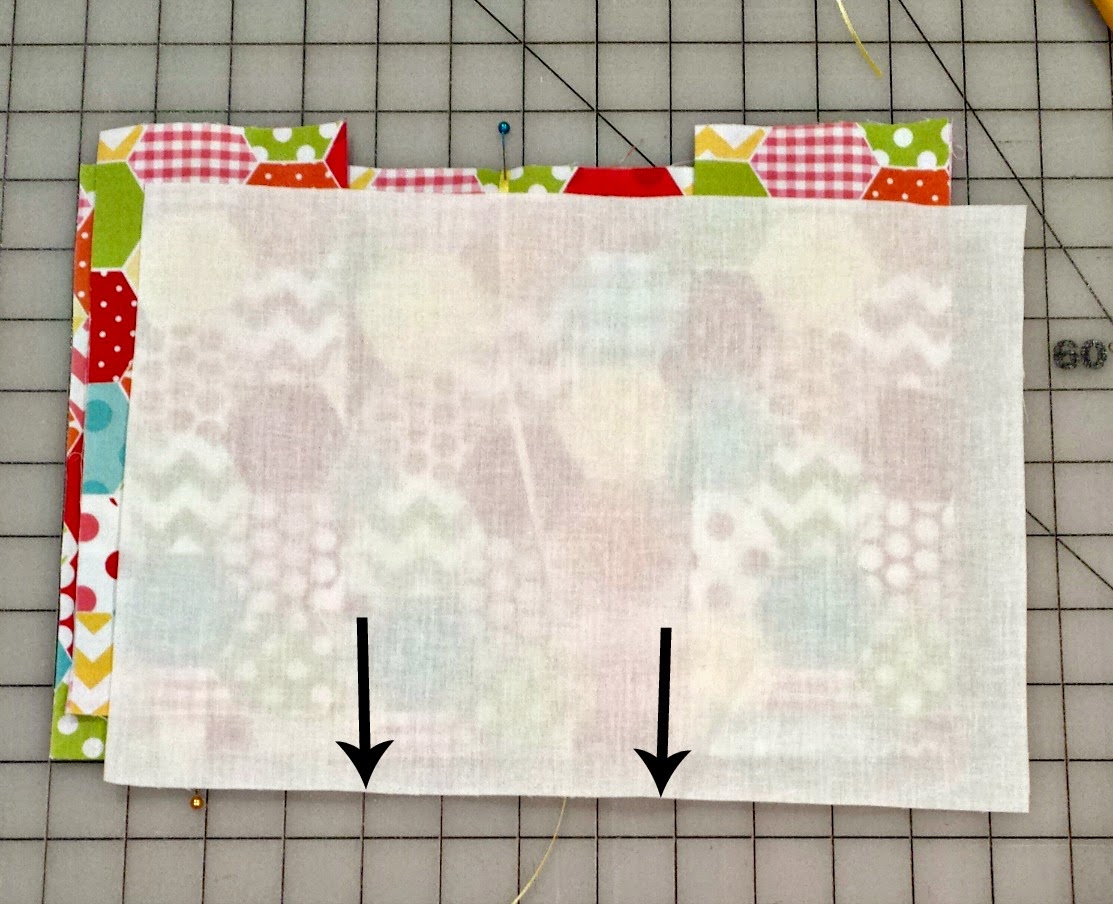
Line up the sleeves with the short edges of the cover, raw edges out (the folds should be in the center). Place the inside of the cover (the white fabric in my sample) on top, (RST) lining up all edges. Pin around the whole cover leaving the bottom between the two sleeves open for turning. (marked with arrows)
Sew around with 1/2″ seam allowance, back stitch at beginning and end. Clip corners and turn right side out. Press all seams, folding under the edges left open for turning. Sew the opening shut with a scant top stitch.
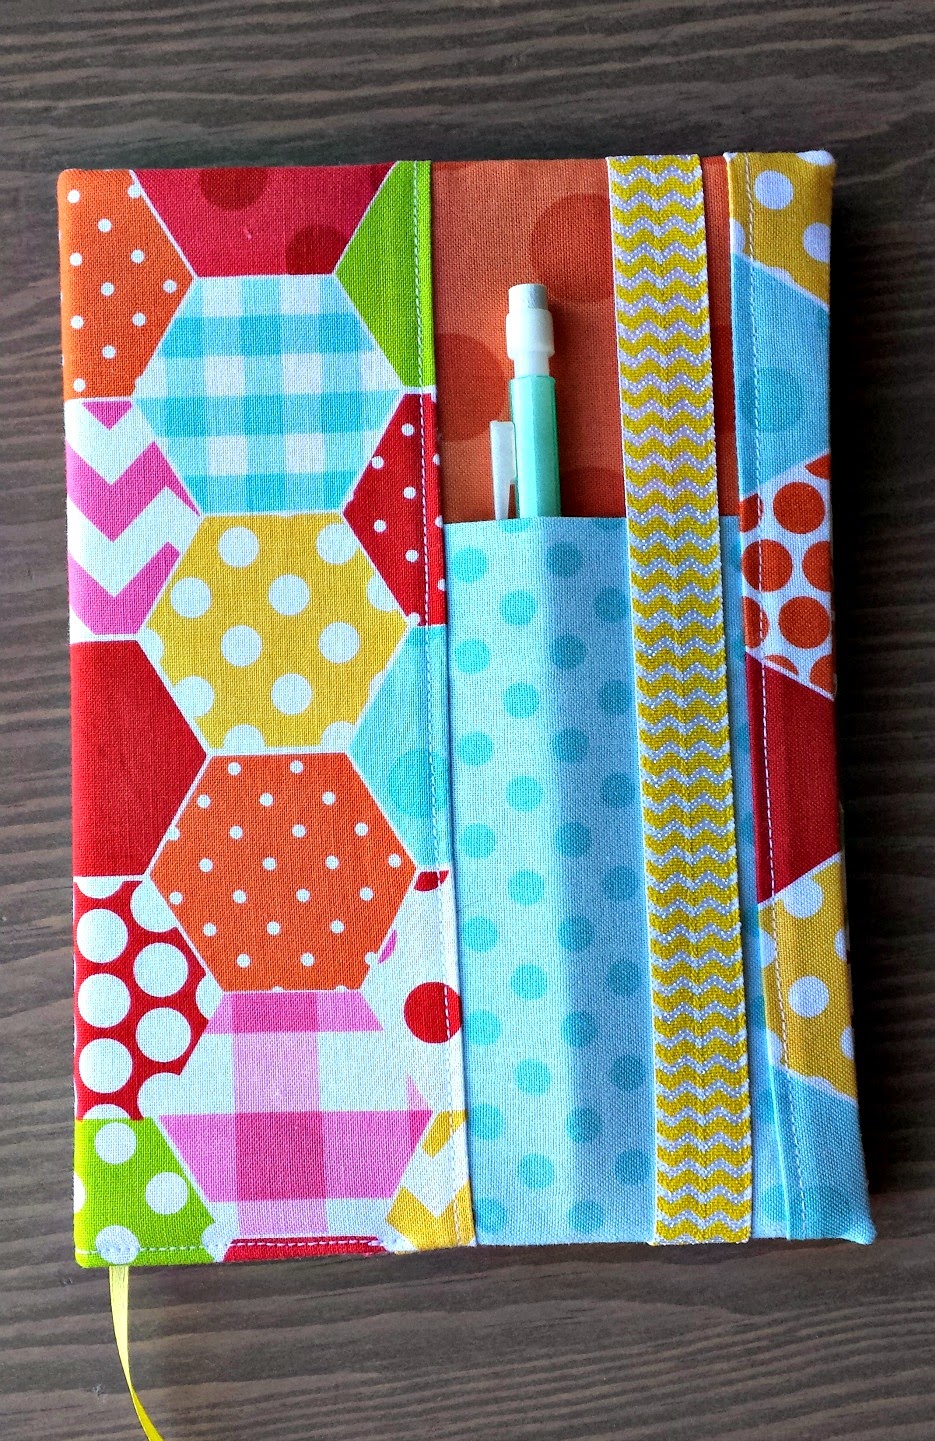
Slide in your notebook and you’re done! This is exactly how to cover a book with fabric!
Once you have your measurements figured out, the hardest part of making these is choosing which darling fabrics to get from The Ribbon Retreat to use!
xoxo,
Amy
